14 Iris Pruning Tips for Healthier Rhizomes and Bigger Blooms
In my years of maintaining perennial beds, irises are one of those plants people either baby too much or forget about entirely once the blooms fade. Neither approach does the plant any favors. Once flowering ends, irises still need attention, and skipping that step is usually why a once-thriving clump starts producing fewer flowers each year.
This guide walks through the full pruning routine for irises, from the right timing down to dividing overcrowded rhizomes, so your beds stay healthy and colorful season after season.
1. Why Pruning Irises Actually Matters
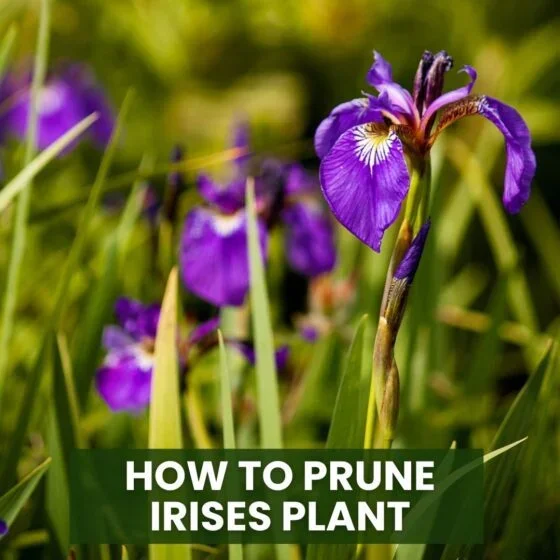
Pruning irises is not just tidying up. Regular trimming prevents fungal problems like leaf spot and soft rot, keeps rhizomes from being smothered by old foliage, and clears away the debris that tends to attract pests.
Skip this step for a season or two and the plant does not just look messier. It genuinely produces weaker growth and fewer blooms the following year.
2. When to Prune Irises for Best Results
Timing makes a real difference with irises. The best window falls after flowering ends, usually in late summer or early fall, once the blooms have faded and the foliage starts to yellow on its own.
Cutting back too early works against the plant, since it is still storing energy in the rhizome for next year. Waiting until the leaves naturally begin to die back ensures the plant has absorbed what it needs before you start trimming.
3. Tools You Will Need
Irises do not need a large tool collection, just a few clean, sharp pieces. Garden shears or scissors handle both the flower stalks and the foliage without crushing the plant tissue.
Keep a disinfectant wipe or rubbing alcohol nearby to sanitize blades between plants, especially if you are working across a bed with more than one iris clump.
4. Remove Spent Flower Stalks
Once all the blooms on a stalk have faded, cut the entire stalk down to the base. This stops the plant from putting energy into forming seeds and redirects that energy back into the rhizome instead.
It is a small step that gets skipped often, mostly because a spent stalk does not look urgent. Leaving it in place, though, quietly drains resources the rhizome could use for next year’s growth.
5. Trim Damaged and Diseased Leaves
Any brown or diseased leaves should come off at the base as soon as you spot them. These weakened leaves are usually the first place pests and fungal problems take hold.
Cut cleanly rather than pulling by hand, since tearing leaves open wounds that invite disease in far more easily than a clean cut ever would.
6. Shape the Remaining Foliage Into a Fan
Once the damaged material is gone, trim the healthy green leaves back to about six to eight inches. Cutting them into a neat fan shape does more than tidy things up, since it genuinely improves airflow and sunlight exposure around the rhizome.
That improved circulation is one of the simplest ways to prevent rot before it starts, and it takes only a few extra minutes once you get the hang of the angle.
7. Bearded vs. Beardless Irises Need Different Timing
Not every iris variety follows the exact same schedule. Bearded irises, the most common type in home gardens, should be pruned right after blooming, with leaves trimmed to about a third of their height in late summer.
Beardless types like Siberian or Japanese irises prefer more moisture and a later prune, waiting until fall once the leaves have turned brown. If you are planning your bed around both types, our perennial garden layout ideas are worth a look, since mixing bloom times across a perennial bed keeps color going longer through the season.
| Type | When to Prune |
|---|---|
| Bearded Iris | Right after blooming, late summer |
| Beardless Iris | Fall, once leaves turn brown |
8. Divide Irises While You Are Already Pruning
Pruning time is also the right moment to check whether your irises need dividing. Every three to four years, clumps tend to get overcrowded, and that crowding is often the real reason flowering slows down.
Once the leaves are trimmed, dig up the rhizomes carefully and cut away any soft or rotted sections. Divide the healthy parts so each piece keeps at least one fan of leaves attached before replanting.
9. Winter Cleanup and Protection
Once winter sets in, irises go dormant, and your focus shifts to cleanup and protection rather than active pruning. In colder regions, wait until the first frost has finished off most of the foliage, then cut leaves back to three or four inches.
This shorter cut helps prevent rot and discourages overwintering pests like iris borers from settling in for the season.
10. Catching Up in Early Spring
If fall pruning did not happen, early spring is still a fine time to tidy up. Gently clear away any remaining dead foliage and debris left around the plant from winter.
While you are at it, check for soft rot or borer damage and remove affected areas right away. Do not wait for a scheduled pruning session if you spot a problem early in the season.
11. Preventing Disease While You Prune
Irises are prone to leaf spot and rhizome rot, especially in humid conditions, but most of this is preventable through habits built into your regular pruning routine.
Keep shears sterilized, remove every bit of cut debris from the bed, and give plants enough spacing to let air move through freely. Watering at the base instead of on the foliage also cuts down on the moisture that fungal problems need to spread.
12. Pruning Irises Near Shrubs or Hedges
Irises planted near yew shrubs or hedges need a bit of extra care. Yews often cast shade and drop needles that can make nearby soil more acidic than irises prefer.
Keep the area clear of fallen debris and trim your irises slightly shorter in these spots to improve airflow and cut down on mold. If you are working out the layout around shrubs and beds, our lawn stone edging ideas help define clean borders that make spacing and airflow easier to manage.
13. Post-Pruning Care
Once pruning wraps up, irises need a gentle aftercare routine to recover and prepare for the next season. Water lightly for a few weeks, keeping an eye out for overwatering, which can quickly lead to rot.
Fertilize with a low-nitrogen mix in early spring to support blooms rather than excess foliage, and mulch lightly in fall to protect the rhizomes through colder months. If mulching is part of your seasonal routine anyway, our painted rock garden ideas pair nicely as a low-maintenance border option around iris beds.
14. Common Mistakes to Avoid
A handful of habits cause more problems than most gardeners realize. Cutting too early, before blooms fade and leaves yellow, weakens the plant before it has finished storing energy for next year.
Leaving debris behind invites disease, over-trimming green leaves robs the rhizome of the energy it needs, and skipping division altogether leads to crowded clumps that bloom less each season. Slowing down and following the seasonal rhythm avoids all four.
Final Thoughts
Pruning irises well comes down to timing more than technique. Wait for blooms to fade, trim into a clean fan shape, and use the same session to check whether the clump needs dividing.
Keep up with winter cleanup and light spring touch-ups, and your irises will keep rewarding you with strong rhizomes and vibrant blooms year after year.
FAQ
When is the best time to prune irises?
After flowering ends, usually late summer or early fall, once the blooms fade and leaves begin to yellow naturally.
How short should I cut iris leaves?
Trim healthy leaves to about 6 to 8 inches in a fan shape, and cut back to 3 to 4 inches after the first winter frost.
How often should irises be divided?
Every 3 to 4 years, once clumps become overcrowded and flowering starts to slow down.
Do bearded and beardless irises need different care?
Yes. Bearded irises are pruned right after blooming in late summer, while beardless types are pruned later in fall.
What is the biggest mistake people make when pruning irises?
Cutting back too early, before the plant has finished storing energy for next year’s blooms.