The Complete Guide on How to Save Plants From Dying
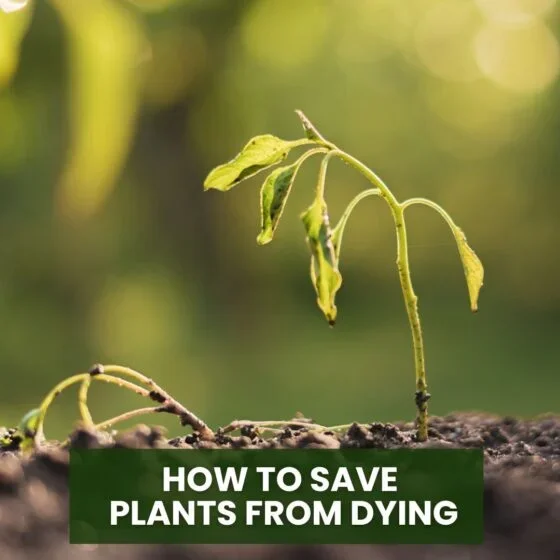
A drooping, yellowing, or wilting plant looks like a lost cause, but most of the time it isn’t. Plants send out warning signs long before they actually die, and if you catch those signs and respond the right way, recovery is very possible.
This guide walks through 13 practical steps for reviving a struggling plant, from checking the soil to adjusting light, feeding, and giving it the time it needs to bounce back.
1. Diagnose the Real Problem First
Plants rarely decline for just one reason. Most of the time it comes down to an imbalance in light, water, soil, or nutrients, and guessing at the fix without knowing the cause usually wastes valuable time.
Look closely at the leaves, stems, and soil condition before changing anything. Drooping, yellowing, curling, and spotting all point in different directions, so this first look is what guides every step after it. If browning is the main symptom you’re dealing with, our guide on why plant leaves turn brown breaks down each pattern in more detail.
2. Check Soil Moisture Before Anything Else
Overwatering and underwatering are the two most common reasons plants decline, and both can look surprisingly similar at first glance. Testing the soil directly is the fastest way to tell them apart.
Push a finger about two inches into the soil. If it comes out bone dry, the plant needs water. If it feels soggy or cool, it’s likely drowning and needs a break from watering instead.
3. Fix Your Watering Routine
Every plant has its own watering rhythm depending on the species and the environment it’s kept in. A fixed weekly schedule often does more harm than good since it ignores what the soil is actually telling you.
Water slowly and evenly until it runs from the drainage holes, then let the pot fully drain before setting it back on a saucer or tray. Consistent, responsive watering supports strong roots far better than routine ever could.
4. Move the Plant to Better Light
Light drives photosynthesis, so getting it wrong shows up fast in a plant’s overall health. Too much direct sun scorches leaves, while too little leaves growth pale, stretched, and weak.
Match the plant to the light it actually needs, bright light for succulents, indirect light for most foliage plants, and lower light for hardy tropicals. Even a small move across the room can restore color within a couple of weeks.
5. Feed It the Right Nutrients
Pale leaves, weak stems, and slow growth often point to a nutrient shortage rather than a watering or light issue. A balanced, slow-release fertilizer applied correctly can turn this around over the following weeks.
Hold off on feeding a severely stressed plant right away. Let it stabilize with proper watering first, then introduce nutrients gradually so the roots aren’t overwhelmed while they’re already under strain.
6. Repot Crowded or Rotting Roots
The roots tell you more about a plant’s health than any other part. Slide it gently out of the pot and take a close look before deciding on next steps.
Roots circling tightly around the base mean the plant is root-bound and needs a larger pot. Brown, mushy roots need trimming before repotting into fresh, well-draining soil so the plant has room and clean conditions to recover in. Our step-by-step repotting guide covers pot sizing and soil choice in more depth.
7. Trim Away Damaged Leaves and Stems
Dead or dying foliage pulls energy away from the parts of the plant that still have a chance to recover. Cutting it away lets the plant redirect that energy where it actually matters.
Use clean scissors to remove yellow, brown, or wilted sections, cutting close to the base without disturbing healthy tissue nearby. The same principle applies to flowering perennials, where regularly pruning echinacea keeps the plant focused on new growth instead of spent blooms. This also improves airflow and removes hiding spots pests tend to favor.
8. Raise Humidity for Tropical Plants
Many houseplants, especially tropical species, struggle in the dry air typical of most homes. Low humidity shows up as browning edges and a general loss of vigor over time.
Grouping plants together, running a humidifier nearby, or setting pots on a pebble tray with water are all simple ways to raise the moisture level around them without much extra effort.
9. Treat Pests Before They Spread
A weakened plant becomes an easy target for pests like spider mites, aphids, and mealybugs, which can accelerate its decline if left untreated. Catching them early makes treatment far simpler.
Check under the leaves for sticky residue, fine webbing, or small cotton-like patches. Treat with neem oil, insecticidal soap, or rubbing alcohol on a cotton swab, repeating every few days until the pests are fully gone.
10. Stabilize the Temperature
Sudden temperature swings stress plants faster than most people expect. Cold drafts, heat vents, and rapid weather changes can trigger drooping, yellowing, and leaf drop almost overnight.
Keep plants a short distance from windows on cold nights and away from heaters or air conditioning vents. Stable, moderate conditions give a recovering plant one less thing to fight against.
11. Refresh Compacted, Tired Soil
Soil that has been sitting for years loses structure and compacts, blocking the air pockets roots depend on. This slows water movement and can quietly suffocate a plant over time.
If the soil feels hard and heavy, replace the top few inches or repot completely into a fresh, well-draining mix. New soil brings back the aeration and nutrients a struggling plant needs to recover.
12. Propagate Healthy Cuttings If Needed
Sometimes the main plant is too far gone to save, but that doesn’t mean every part of it is lost. Healthy stems or leaves can often be used to start something new entirely.
Take cuttings from the greenest, healthiest sections and place them in water or moist soil to root. This gives you a fresh, genetically identical plant even when the original base can’t be revived.
13. Be Patient and Keep Monitoring
One of the biggest mistakes in plant recovery is making too many changes at once. After adjusting water, light, or soil, give the plant time to actually respond before stepping in again.
Check soil moisture a couple of times a week, watch for new pests, and adjust care as the seasons shift. Visible improvement can take days or weeks, and steady, patient attention is what carries a plant the rest of the way back.
Final Thoughts
A dying plant rarely means a lost cause. Most of the time, it’s asking for one clear adjustment, whether that’s better watering, more suitable light, fresh soil, or a little extra humidity, and responds well once that need is met.
Work through the signs methodically, make one change at a time, and give your plant the space to recover. With steady care, even a plant that looks close to gone can come back stronger than before.
FAQ
How do I know if my plant can still be saved?
If the stems are still firm and green underneath, even a wilted or yellowing plant usually has a good chance of recovering with the right care.
How long does it take for a dying plant to recover?
Visible improvement can take anywhere from a few days to several weeks, depending on how stressed the plant was and how quickly the underlying cause is fixed.
Should I fertilize a dying plant right away?
No, it’s best to stabilize watering and light first, then introduce a light, balanced fertilizer once the plant shows early signs of recovery.
What’s the fastest way to check what’s wrong with my plant?
Test the soil moisture first, since overwatering and underwatering account for most cases of plant decline.
Can I save a plant if the roots are already rotting?
Often yes. Trim away the black or mushy roots, repot in fresh soil, and reduce watering while the plant rebuilds its root system.
Is it worth propagating a plant that’s too far gone?
Yes, taking cuttings from any healthy green stems or leaves lets you start a new, identical plant even if the original can’t be saved.