How to Prune ZZ Plant: Keep It Lush and Healthy All Year
ZZ plants have a reputation for being nearly indestructible, but even a low-maintenance favorite benefits from the occasional trim.
A little pruning keeps the glossy leaves looking their best and stops the plant from growing tall and leggy over time.
This guide covers 12 steps for pruning a ZZ plant properly, from timing your cuts to propagating what you trim away.
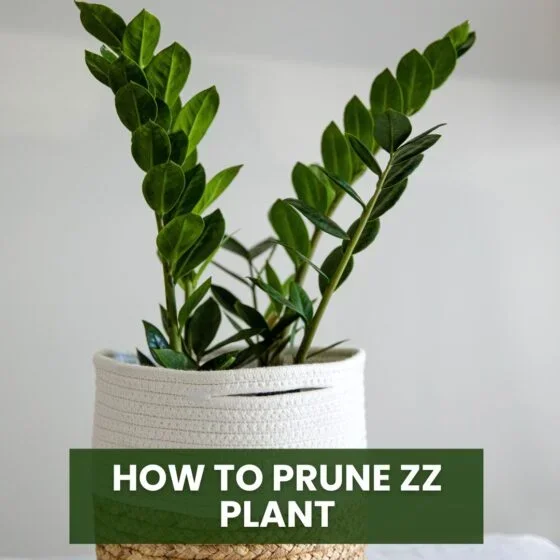
1. Know Why Pruning Matters
Pruning a ZZ plant is about more than appearance. Older leaves that turn yellow, stems that stretch too tall, or new growth that gets crowded can all quietly drain energy from the rest of the plant.
Trimming these parts away redirects that energy toward healthy stems and fresh leaves, which is what keeps a ZZ plant looking full instead of sparse and uneven.
2. Time It Around the Growing Season
Spring and summer are the best times to prune a ZZ plant, since it’s actively growing and recovers from cuts much faster during this stretch of the year.
Hold off on heavier pruning through fall and winter. Growth naturally slows during colder months, so cuts made then take longer to heal and regrow.
3. Gather the Right Tools
Sharp, clean pruning shears or scissors make precise cuts that heal faster than a torn edge from dull blades. Wipe them down with rubbing alcohol before you begin.
Gloves are worth wearing too, since ZZ plants produce a mild sap that can irritate sensitive skin during longer pruning sessions.
4. Inspect Before You Cut Anything
Take a slow look over the whole plant before reaching for the shears. Look for yellowing leaves, damaged stems, or overly long growth that’s throwing off the shape.
Identifying these areas first keeps you from over-pruning and helps the plant stay balanced and natural-looking once you’re done.
5. Remove Yellow or Dead Leaves
Start with the easy part. Trim off yellow or dying leaves right at their base, where the leaf connects to the stem, rather than cutting through the middle of the leaf.
These leaves often signal a nutrient imbalance or normal aging, and removing them lets the plant put its energy into healthy new foliage instead.
6. Cut Back Leggy or Overgrown Stems
Low light often causes ZZ plants to stretch out and grow leggy. Trimming these stems at the base encourages fresh new growth to come in from below instead.
If the top portion still looks healthy, don’t toss it. Save it for propagating a new plant later in this guide rather than discarding a perfectly good cutting.
7. Thin Out Crowded Growth
When too many stems pack together tightly, they start competing for light and nutrients. Removing a few stems from the center gives the rest more room to thrive.
This also improves airflow through the plant, which helps prevent the kind of fungal issues that tend to show up in dense, crowded growth.
8. Shape for a Balanced Look
Once the damaged and excess stems are gone, shift your focus to shaping. Trim any noticeably uneven growth to bring the plant back toward a balanced, symmetrical look.
The goal is to keep its natural vase-like form rather than forcing a shape that fights against how the plant actually grows. A gentle touch works better than heavy cutting here.
9. Clean the Leaves Once You’re Done
After pruning, gently wipe the remaining leaves with a damp cloth to clear away dust. This small step helps restore the glossy shine ZZ plants are known for.
A touch of mild dish soap mixed into the water adds extra cleaning power for leaves that have collected dust over several months, just be sure to wipe them dry afterward.
10. Propagate the Healthy Cuttings
Don’t let the trimmed stems go to waste. ZZ plants propagate easily, so healthy cuttings can become entirely new plants with very little extra effort.
Place the cuttings in a jar of water or directly into moist soil, and roots should start forming within a few weeks. The same basic idea applies to propagating Monstera cuttings, if you’re growing a small collection of houseplants from trimmings.
11. Avoid Over-Pruning
It’s tempting to trim more than needed once you get going, but ZZ plants grow slowly and recover best when at least two-thirds of the stems are left intact.
Watch the plant for a few days after pruning. Wilting or new yellowing can be a sign of stress, and if that happens alongside other issues, our guide on how to save a dying plant covers the broader signs worth checking.
12. Keep Up With Aftercare
Once pruning is done, place the plant somewhere with bright, indirect light and water only when the soil has dried out. New shoots typically appear within a few weeks if browning shows up elsewhere on the plant during recovery, our leaf discoloration guide covers likely causes in more depth.
Wait about two weeks before fertilizing, and if the plant looks crowded in its pot, repotting into a container one size larger gives the roots room to support the fresh growth that follows.
Final Thoughts
Pruning a ZZ plant doesn’t take much, but it makes a real difference in how full and glossy it looks over time. Remove the damaged parts, thin what’s crowded, and let the plant recover at its own slow, steady pace.
Stick to a light routine once or twice a year, and your ZZ plant should stay one of the easiest, most rewarding houseplants in the room.
FAQ
When is the best time to prune a ZZ plant?
Spring and summer are ideal, since the plant is actively growing and recovers from cuts much faster during this period.
Is ZZ plant sap dangerous?
It’s mild but can irritate sensitive skin, so wearing gloves during longer pruning sessions is a good precaution.
How much of my ZZ plant can I safely trim?
Keep at least two-thirds of the stems intact in any single session, since ZZ plants grow slowly and recover best from light pruning.
Can I propagate ZZ plant cuttings?
Yes, healthy stem cuttings root easily in water or moist soil, usually showing new roots within a few weeks.
Why are my ZZ plant’s leaves turning yellow?
Yellowing is often normal aging, but if it shows up across many leaves at once, it can point to a watering or light issue worth checking.
How often should a ZZ plant be pruned?
Once or twice a year is usually enough, with occasional light trims in between if you spot yellow leaves or uneven growth.