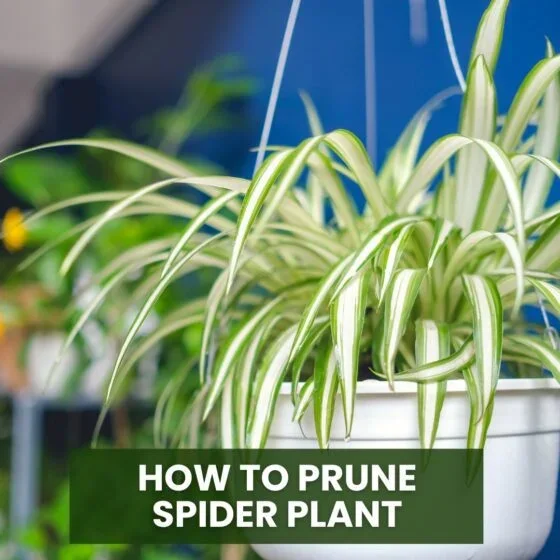
How to Prune a Spider Plant: 12 Steps for Fuller, Healthier Growth
Spider plants are famous for being easy to grow, but even the most low-maintenance houseplant benefits from a little regular trimming. Pruning keeps the arching leaves looking full, manages the baby spiderettes, and stops the plant from ever looking overcrowded.
This guide covers 12 steps for pruning a spider plant properly, from removing damaged leaves to what to do with all those spiderettes once you have too many.
1. Know Why Pruning Matters
Pruning a spider plant is about more than looks. Dead or yellowing leaves quietly drain energy that could otherwise go into fresh growth, and too many spiderettes can pull nutrients away from the parent plant.
Regular trimming redirects that energy back into healthy leaves, keeping the whole plant looking lush and full instead of thin and scattered.
2. Know the Right Time to Prune
Spring and early summer are the best windows for heavier pruning, since the plant is actively growing and recovers from cuts much faster during this stretch.
Light pruning, like snipping off a dead or brown leaf here and there, is fine any time of year. Just hold off on bigger trims through winter, when growth naturally slows down.
3. Gather Clean, Sharp Tools
Clean scissors or pruning shears make precise cuts that heal faster than a ragged edge from dull blades. Wipe them down with rubbing alcohol before you start.
This matters even more if you’re checking the plant for any diseased leaves, since dirty tools can spread bacteria straight to healthy foliage.
4. Remove Dead or Yellowing Leaves
Start with the obvious ones. Discolored, dry, or yellowing leaves drain energy from the plant and make the whole thing look unkempt.
Cut these as close to the soil line as possible without disturbing nearby healthy foliage, using clean scissors for a precise cut.
5. Trim Brown Leaf Tips Without Cutting the Whole Leaf
Brown tips are common on spider plants and usually come from low humidity, fluoride in tap water, or a bit too much fertilizer. Rather than removing the whole leaf, just trim the brown edge.
Follow the leaf’s natural curve as you snip, which keeps the plant looking neat without sacrificing more green than necessary. If browning shows up well beyond just the tips, our guide on why plant leaves turn brown covers the wider set of causes worth checking.
6. Cut Off Diseased or Mushy Leaves Right Away
Mushy, spotted, or unusually soft leaves can be a sign of root rot or a fungal issue starting to spread. These need to come off immediately, not just get added to the general cleanup list.
Use sterilized shears for this step specifically, since disease can transfer easily between cuts if your tools aren’t clean.
7. Trim Overgrown Leaves for Shape
Over time, spider plants can get leggy or lopsided, with a few leaves stretching well beyond the rest of the pot. Trim these back to bring the shape into better balance.
Focus on the outer foliage rather than the center, keeping the overall look tidy and symmetrical without disrupting where new growth actually comes from.
8. Manage Spiderettes and Flower Stalks
Spiderettes are one of the plant’s most charming features, but too many at once can pull nutrients away from the parent. Snip off some of the connecting stems to keep things balanced, saving the healthiest ones for propagation.
The long flower stalks that produce these spiderettes can also be cut back to the base once the flowers fade, redirecting energy straight back into leaf growth.
9. Clean the Leaves and Water Lightly After Pruning
Once the cutting is done, wipe the remaining leaves with a damp cloth to clear away dust. This helps the plant absorb more light and makes it easier to spot hidden pests like spider mites.
Water lightly afterward rather than heavily. Freshly pruned roots and stems are more sensitive to excess moisture, so let the soil drain well and stay just slightly moist.
10. Feed and Propagate What You Trimmed
Pruning stimulates new growth, which makes it a good moment to add a balanced liquid fertilizer, roughly once a month through spring and summer. Skip feeding in winter to avoid root burn.
Any healthy spiderettes you cut off can go straight into water or moist soil to root, the same simple method covered in our ZZ plant propagation steps, and within a few weeks they’ll be ready to transplant into their own pots.
11. Check for Root-Bound Growth While You’re In There
If roots are poking through the drainage holes or the leaves seem unusually crowded, the plant may be root-bound. Pruning time is a good opportunity to check.
If needed, divide the plant into smaller sections and repot each one separately into fresh soil. This restores space for the roots and often perks the whole plant up within a few weeks. If a divided section still looks stressed afterward, our guide on how to save a dying plant covers the recovery steps that follow.
12. Avoid Over-Pruning and Stay Consistent
Always leave at least half of the leaves intact during any single pruning session. Removing too much at once can shock the plant and slow its ability to photosynthesize properly.
Light, consistent pruning every few weeks does far more for a spider plant than one big, heavy cutback ever could. It also keeps browning and legginess from building up between sessions.
Final Thoughts
Pruning a spider plant is a quick, low-effort habit that keeps the foliage lush and the spiderettes from taking over. Remove what’s dead or diseased, trim for shape, and manage the babies before they crowd out the parent plant.
Stay consistent with light trims every few weeks, and this easygoing houseplant will keep rewarding you with fresh, arching growth all year round.
FAQ
When is the best time to prune a spider plant?
Spring and early summer are ideal for heavier pruning, though light trims for dead or brown leaves can happen any time of year.
Should I remove the whole leaf if only the tip is brown?
No, trim just the brown edge following the leaf’s natural curve, which keeps more healthy green tissue intact.
How many spiderettes should I leave on the plant?
It depends on the plant’s size, but removing some regularly prevents the babies from draining too many nutrients from the parent.
Can I propagate spiderettes I cut off?
Yes, healthy spiderettes root easily in water or moist soil, usually within a few weeks before they’re ready to transplant.
How much of my spider plant can I prune at once?
Leave at least half the leaves intact in any single session to avoid shocking the plant and slowing its recovery.
What does it mean if my spider plant looks root-bound?
Roots poking through the pot or crowded leaves are common signs. Dividing the plant and repotting into fresh soil usually solves it.